Tuesday, January 31, 2012

Cozy winter nights (treasury Tuesday).

Since I didn't get around to creating a treasury this week, I decided to instead share a few other treasuries that caught my eye.

I love our sunny San Diego weather, but every once in a while I get nostalgic for winter, and snow, and cozy fireplaces, and the stillness of the forrest after blizzard (see, there I go again...). These treasuries make me wish I was back in NY, curled up with a good book and hot coffee in front of the fire. I hope you enjoy them too!

Baby it's cold outside

Sunday, January 29, 2012

Lace earring holder (tutorial).


This earring holder is surprising simple to make, looks great, and is an easy way to organize all of your jewelry. These make great gifts too - I love personalizing the frame design to match my friends' styles. This one's mine... kind of boring - I was going to decorate it, but I've been lazy this week. That'll have to be a project for a later date.

This is a very loosely written tutorial because the fun part is making the design uniquely yours. If you make one, I'd love to see a picture of it! Either post a link to it in the comments, or email it to me at MdoubleMcrafts {at} gmail {dot} com.

Thursday, January 26, 2012

Coconut chocolate tarts with caramel (recipe).


Yum! These are so delicious that I'm making another batch as I write this. You only need five ingredients to make these! The first batch disappeared very quickly at our book club last weekend, and left me craving more chocolate-coconutty goodness. 

I based this recipe on this one from Martha Stewart; how can you go wrong with chocolate, cream, coconut, and butter?! I picked up some Kraft Caramel Bits on clearance the other day, so I decided to add caramel to the top, but they taste great without it too. 

This recipe makes about three dozen mini tarts. Since it's easier to let them cool completely before removing from the mini muffin tins, you'll need three tins to bake them all in (I only have two, so I used small ramekins for the rest). You can also use a regular muffin tin, which makes about a dozen tarts. I also highly recommend using cupcake wrappers - getting these out of the tin in one piece was tricky business. 

Ingredients
14 oz (1 bag) shredded sweetened coconut
5 tbs butter, softened
1 cup heavy cream
1.5 cups semisweet chocolate chips
4 tbs caramel bits (optional)

Instructions
For the crust:
1) Turn oven on to 350 degrees F.
2) Combine one third of the coconut with the butter in a food processor. Process on medium for about a minute, until it forms a uniform sticky mixture.
3) In a mixing bowl, combine the rest of the coconut with the butter-coconut mixture.
4) Add two tablespoons of the coconut mixture to each muffin cup (lined w/ cupcake wrapper!). Use your fingers to press the mixture into the bottom & sides (2 tbs looks like a lot, but the coconut mixture is very fluffy, & compacts a lot when you press it down).
5) Bake for 15 minutes, or until golden brown. If necessary, press down the coconut again (I used the handle of a butter knife to do this).
6) Let cool (at least 30 minutes).

Toasted coconut cups; stirring the ganache; filled cups cooling
For the filling:
1) Heat the heavy cream in a sauce pot until almost boiling.
2) In a large mixing bowl, pour the cream over the chocolate. Let sit for 10 minutes.
3) Stir mixture until chocolate is completely combined, and the ganache is smooth and uniform.
4) Pour the ganache into the coconut cups. Transfer to the refrigerator to cool (at least 30 minutes again). Remove tarts from the tin.
5) Optional: Melt the caramels in a small pot (add a few drops of water if the caramel is too thick). Drizzle caramel over the tarts. 
6) Refrigerate until serving.

While I was making these, my friend Adriane was busy making quiche for the book club (we always eat very well at our meetings!). I love cooking with Adriane, even though my kitchen is tiny, we never seem to get in each others way, and we have so much fun! She made two delicious quiches; a bacon, broccoli, cheddar one, and a spinach, feta, sun dried tomato one. Yum!

Cheesy bacon & broccoli goodness
Shared at:
Mom on Timeout: Iron Chef Chocolate
WhipperBerry Friday Flare linky party

Tuesday, January 24, 2012

San Diego loves Etsy (treasury Tuesday).

Etsy Artisans of San Diego County (EASDC) just happens to be one of the awesome teams on Etsy that I'm a member of. There are so many sweet and talented crafters in this group, and it is a great resource for advice.

Here's sampling of some of my current favorites from team EASDC (I'm still in full on Valentine's mode - sorry if you're getting a heart overdose).

San Diego loves Etsy

If you sell on Etsy, and haven't already joined a local group, I highly recommend it! This is a great way to get advice on local tax laws, business licenses, and shipping rates. I haven't made the leap to selling at markets or craft fairs yet, but local teams are a great resource for this also.

On another note, you may have noticed that I am settling into a pattern with this blog. It's been three and a half weeks now, and I'm really enjoying blogging (hope you're enjoying reading!). Three posts a week seems to be the right amount for me (at least for now). My schedule is to share a treasury list on Tuesday, a recipe on Thursday, and a craft on the weekend. 

If you're sick of Valentine's day already, don't worry. I promise a completely non-Vday craft for this Saturday (it involves lace - how fun!).

Saturday, January 21, 2012

Eucalyptus heart wreath.


Remember the paper flower I showed you how to make last week? Here is what I did with mine! I made this wreath out of eucalyptus branches from the gully by our house, but this is a great way to decorate any wreath for Valentine's day.

Honestly, I really had no clue what I was doing when I was making the wreath, and I am sure there is a much better way of going about it, so I'm not going to post a full tutorial.

For those who are curious however, here's a quick rundown: I made the frame by cutting the hook part off of a wire coat hanger & wrangling it into a heart shape. I then twisted several branches around the wire (starting at the bottom of the heart, & allowing the extra leaves to dangle into the heart at the top). I wrapped floral wire around the whole thing to secure it, and then I tucked individual leaves in to fill out the wreath & hide the wire. I used wire to attach the ribbon for hanging, and I glued the flower on using E6000.

I'm not thrilled with the way it came out, but since it's only going to be up for a few weeks it's good enough that I'm not going to redo it. I love the smell of the eucalyptus, and I'm already brainstorming how to use it in my spring decorations. Let me know if you have any ideas!


Thursday, January 19, 2012

Crock pot sweet and spicy meatloaf (recipe).


This recipe is an adaptation of a recipe given to me by my sweet friend Amanda from back home (I miss you Amanda! Please come visit again soon ❤). Cooking the meatloaf in the crock pot means you can come home to a completely finished dish, and it keeps it moist (even if it cooks a little longer than it should...).

This makes a lot - about 8 servings, but I wanted to have enough to cover the entire bottom of the crock pot. Good thing it makes delicious leftovers. You can also make this in the oven; bake covered for one hour at 350 degrees F.

Tuesday, January 17, 2012

All you need is LOVE.

Valentine's day is coming soon (well.. okay... it's still four weeks away, but getting closer!), so to get in the mood I made this sweet treasury collection on Etsy. 

All you need is LOVE

I love creating treasuries - it gives me an excuse to '"shop" around on Etsy without emptying out my wallet. I am always amazed and inspired by the incredible creativity of my fellow Etsy artisans. 

Did you notice my candle holder in the treasury? I don't usually feature my own items in my treasuries, but I listed the Hearts & Maps hurricane glass the same day I made the treasury, and it fit in so well! Here's a bigger picture of it.

Hearts & Maps Hurricane Glass - decoupaged candle holder

I was experimenting, and I decoupaged the glass with tissue paper to see what would happen. I love the result! It creates the illusion of frosted glass, and it glows gorgeously with a candle in it.

Sunday, January 15, 2012

Ombre water lily paper flower (tutorial).


These flowers are so much fun to make, and they come out so pretty! I'm planning on incorporating these into my Valentine's day decorations this year  ❤ They also make adorable gift toppers in place of a traditional bow.

Supplies: card stock in 3 colors, glass gem, glue, stapler, scissors
Start by cutting out two flower shapes for each color (print and trace the template at the bottom of this post). Don't worry - this is the slowest, hardest part of making these.


Use your fingers to gently curl the petals upward so that all of your flower shapes look like the one above. 


Stack the bottom five flower shapes together, and arrange to your liking. Staple the layers together using two staples in an X shape (this will ensure the flower stays stable and secure).


Glue the final flower shape into the middle of the flower to cover the staples (I use Elmer's glue for this). Let dry. Glue the glass gem into the center of the flower (I use either super glue or E6000). Adjust the petals if needed. Now take a step back and admire your work!

Flower template - print out to be approximately 4" across

Oopsey Daisy


Thursday, January 12, 2012

Crock pot teriyaki chicken (recipe).


I received a crock pot for Christmas, and I absolutely love it! It's wonderful to have an almost finished meal ready and waiting for us when I get home at the end of the day. I've never had a slow cooker before, so I am planning on trying at least one new recipe with it every week (last week I made a chuck roast - it was so tender it literally fell apart when I tried to pick it up). This week's recipe is Teriyaki Chicken.

I based my recipe on this one from Lake Lure Cottage Chicken (there are lots of other mouth watering recipes on this blog too - check it out!). I made a small batch, since it was just the two of us last night, but you could easily double it (or even triple if you have a big enough crock pot).

Saturday, January 7, 2012

A birthday card for Grandma.

My grandma turns 90 later this month, so I decided to make a special birthday card for this very special lady (she's one of my favorite people in the world - strong, smart, kind, & incredibly loving). 


I was inspired to make these flowers by this pin on pinterest. Her favorite color is purple (if you couldn't guess), but you can make this card in any colors you want. 

To get even spacing start by glueing 2 opposing petals, then fill in the rest.
Cut out 6 hearts of equal size for each flower. I used double sided scrapbook paper for the big heart & cardstock for the small ones; any paper stiff enough to hold a sharp crease will work. Fold each heart in half vertically to make petals, then glue the petals onto your card in a flower shape.

I don't have a dark purple ink pad, so I used a marker to ink the stamps.
It takes a little longer, but works great in a pinch.
I used these adorable little letter stamps to write out my message. I got this little stamp set for about $1 from Michael's, and I've gotten so much use out of it! To get the spacing right, I stamped the words right to left (I'm not really left handed, but my right hand was busy with the camera).


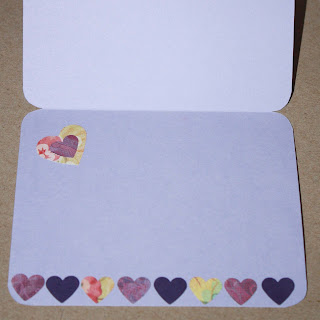
I punched out some more hearts to decorate the inside of the card. Then I decided to round off the corners of the card too - I think it gives it a more finished look.

Thursday, January 5, 2012

A new year. A new day. A new blog.

Happy New Year!

My big goal for 2012 is to become a blogger, and here I am taking my first baby-step. I love cooking, baking, photography, and all types of crafts. I plan on sharing my adventures (and misadventures) in the kitchen and craft room here on this blog.

To start off, I'm showing my off my newest Etsy treasury. Recently, I've been loving yellow & teal together; these colors just make me smile!
It's a brand new day!

I also have my own Etsy shop. Currently most of my items are decoupaged home decor, but I'm always looking for new materials & techniques to work with. I plan on doing a lot more glass etching this year too! You can check out the MdoubleM Etsy shop here.

Until next time,
- Monica